
Red Velvet Cake Balls: Prepare to be utterly captivated by these bite-sized morsels of pure indulgence! Imagine the moist, tender crumb of a classic red velvet cake, transformed into a perfectly poppable treat, enrobed in a luscious coating of smooth, creamy chocolate. These aren't just cake balls; they're an experience.
The allure of red velvet, with its subtle cocoa notes and distinctive tang, has captivated dessert lovers for generations. While the exact origins are debated, many believe it gained popularity during the Great Depression, when cooks used beet juice to enhance the color and moisture of cakes. Today, its vibrant hue and unique flavor profile make it a beloved choice for celebrations and everyday indulgences alike.
What makes red velvet cake balls so irresistible? It's the perfect combination of textures and flavors. The soft, slightly tangy cake interior contrasts beautifully with the sweet, decadent chocolate shell. They're also incredibly convenient – no forks required! These little gems are perfect for parties, potlucks, or simply a delightful afternoon treat. Plus, they're surprisingly easy to make, making them a guaranteed crowd-pleaser. Get ready to embark on a baking adventure that will leave everyone craving more!

Ingredients:
- For the Red Velvet Cake:
- 2 1/2 cups all-purpose flour
- 2 cups granulated sugar
- 1 teaspoon baking soda
- 1 teaspoon baking powder
- 1 teaspoon salt
- 1 tablespoon unsweetened cocoa powder
- 1 cup buttermilk
- 1 cup vegetable oil
- 2 large eggs
- 2 teaspoons vanilla extract
- 1 ounce (2 tablespoons) red food coloring
- 1 teaspoon white vinegar
- For the Cream Cheese Frosting:
- 8 ounces cream cheese, softened
- 1/2 cup (1 stick) unsalted butter, softened
- 4 cups powdered sugar
- 1 teaspoon vanilla extract
- Pinch of salt
- For Coating:
- 12 ounces chocolate candy coating (white, dark, or milk chocolate), or almond bark
- Optional: Sprinkles, chopped nuts, or other decorations
Baking the Red Velvet Cake
- Preheat and Prepare: First things first, preheat your oven to 350°F (175°C). Grease and flour a 9x13 inch baking pan. This will prevent the cake from sticking and make it easier to remove later. I like to use baking spray with flour already in it for extra insurance!
- Combine Dry Ingredients: In a large bowl, whisk together the flour, sugar, baking soda, baking powder, salt, and cocoa powder. Make sure everything is well combined so you don't end up with pockets of baking soda in your cake.
- Combine Wet Ingredients: In a separate bowl, whisk together the buttermilk, oil, eggs, and vanilla extract. Ensure the eggs are fully incorporated for a smooth batter.
- Mix Wet and Dry: Gradually add the wet ingredients to the dry ingredients, mixing on low speed until just combined. Be careful not to overmix! Overmixing can lead to a tough cake.
- Add Red Color and Vinegar: In a small bowl, combine the red food coloring and white vinegar. This step is important because the vinegar helps to activate the red color and bring out the red velvet flavor. Add this mixture to the batter and mix until evenly colored.
- Pour and Bake: Pour the batter into the prepared baking pan and spread it evenly. Bake for 25-30 minutes, or until a toothpick inserted into the center comes out clean. Keep an eye on it – ovens can vary!
- Cool Completely: Let the cake cool in the pan for 10 minutes before inverting it onto a wire rack to cool completely. This is crucial! You don't want to work with a warm cake, or it will crumble too much.
Making the Cream Cheese Frosting
- Cream Butter and Cream Cheese: In a large bowl, beat the softened cream cheese and butter together with an electric mixer until smooth and creamy. Make sure both are at room temperature for the best results. Lumps are not our friends!
- Add Powdered Sugar: Gradually add the powdered sugar, one cup at a time, beating on low speed until combined. This prevents a powdered sugar explosion!
- Add Vanilla and Salt: Stir in the vanilla extract and salt. Mix until smooth and creamy. Taste and adjust sweetness if needed. I sometimes add a little extra vanilla for a richer flavor.
Creating the Cake Balls
- Crumble the Cake: Once the cake is completely cool, crumble it into a large bowl. You can use your hands or a fork to do this. Make sure there are no large chunks remaining.
- Mix with Frosting: Add the cream cheese frosting to the crumbled cake. Start with about 3/4 of the frosting and mix well with your hands until the mixture is moist and holds together when pressed. You might need to add more frosting, depending on the moisture content of your cake. The goal is to create a dough-like consistency.
- Roll into Balls: Roll the mixture into 1-inch balls. Place the cake balls on a baking sheet lined with parchment paper.
- Chill: Place the baking sheet in the refrigerator and chill the cake balls for at least 30 minutes. This will help them firm up and make them easier to dip. You can even chill them for longer, like an hour or two, if you have the time.
Dipping and Decorating
- Melt the Chocolate: Melt the chocolate candy coating according to the package directions. You can use a double boiler or melt it in the microwave in 30-second intervals, stirring in between, until smooth. Be careful not to overheat the chocolate, or it will seize up. If it does seize, try adding a teaspoon of vegetable oil and stirring until smooth again.
- Dip the Cake Balls: Remove the chilled cake balls from the refrigerator. Dip each cake ball into the melted chocolate, using a fork or dipping tools to coat it completely. Tap off any excess chocolate.
- Decorate: Place the dipped cake balls back on the parchment-lined baking sheet. Immediately sprinkle with sprinkles, chopped nuts, or other decorations, if desired. The chocolate will set quickly, so you need to decorate them right away.
- Set and Store: Let the chocolate set completely. This will take about 30 minutes at room temperature, or you can speed up the process by placing them in the refrigerator for a shorter time.
- Enjoy! Store the cake balls in an airtight container in the refrigerator. They are best enjoyed within a few days.
Conclusion:
So there you have it! These Red Velvet Cake Balls are truly irresistible, and I genuinely believe you absolutely must try them. They're the perfect bite-sized treat, offering that classic red velvet flavor in a fun and easy-to-make package. Forget slaving over a full-sized cake – these little gems deliver all the deliciousness with a fraction of the effort. The combination of the moist, slightly tangy cake, the creamy, sweet coating, and that satisfying crunch from the sprinkles is simply divine. They're a guaranteed crowd-pleaser, perfect for parties, holidays, or just a special treat for yourself (because you deserve it!). But the best part? They're incredibly versatile! While I've shared my go-to recipe, feel free to get creative and experiment with different variations. For a richer, more decadent experience, try using a dark chocolate coating instead of white chocolate. Or, if you're a fan of nuts, finely chop some pecans or walnuts and add them to the coating for extra texture and flavor. You could even drizzle the finished cake balls with a contrasting color of chocolate for a beautiful presentation. Serving Suggestions: * Serve these Red Velvet Cake Balls chilled for the best texture and flavor. * Arrange them on a pretty platter for a visually appealing dessert display. * Package them in small gift boxes or bags for a thoughtful homemade gift. * Pair them with a scoop of vanilla ice cream or a dollop of whipped cream for an extra indulgent treat. * For a festive touch, use different colored sprinkles to match the occasion. Think red and green for Christmas, pastel colors for Easter, or spooky sprinkles for Halloween. Variations to Explore: * Cream Cheese Swirl: Before rolling the cake mixture into balls, swirl in a small amount of softened cream cheese for an extra creamy and tangy flavor. * Espresso Kick: Add a teaspoon of instant espresso powder to the cake mix for a subtle coffee flavor that complements the red velvet perfectly. * Peppermint Twist: During the holiday season, add a few drops of peppermint extract to the coating and use crushed peppermint candies for the sprinkles. * Lemon Zest: For a brighter, more refreshing flavor, add the zest of one lemon to the cake mix. * Different Coatings: Experiment with different types of chocolate, such as milk chocolate, dark chocolate, or even flavored candy melts. I'm so excited for you to try this recipe and discover just how easy and delicious these Red Velvet Cake Balls are. Don't be intimidated by the process – it's much simpler than it looks, and the results are well worth the effort. I promise, once you make these, you'll be hooked! Now, it's your turn! Head to the kitchen, gather your ingredients, and get ready to create some magic. And most importantly, don't forget to share your experience with me! I'd love to hear how your cake balls turned out, what variations you tried, and any tips or tricks you discovered along the way. Leave a comment below, tag me in your photos on social media, or send me an email – I can't wait to see your creations! Happy baking!Red Velvet Cake Balls: The Ultimate Guide to Making Delicious Treats
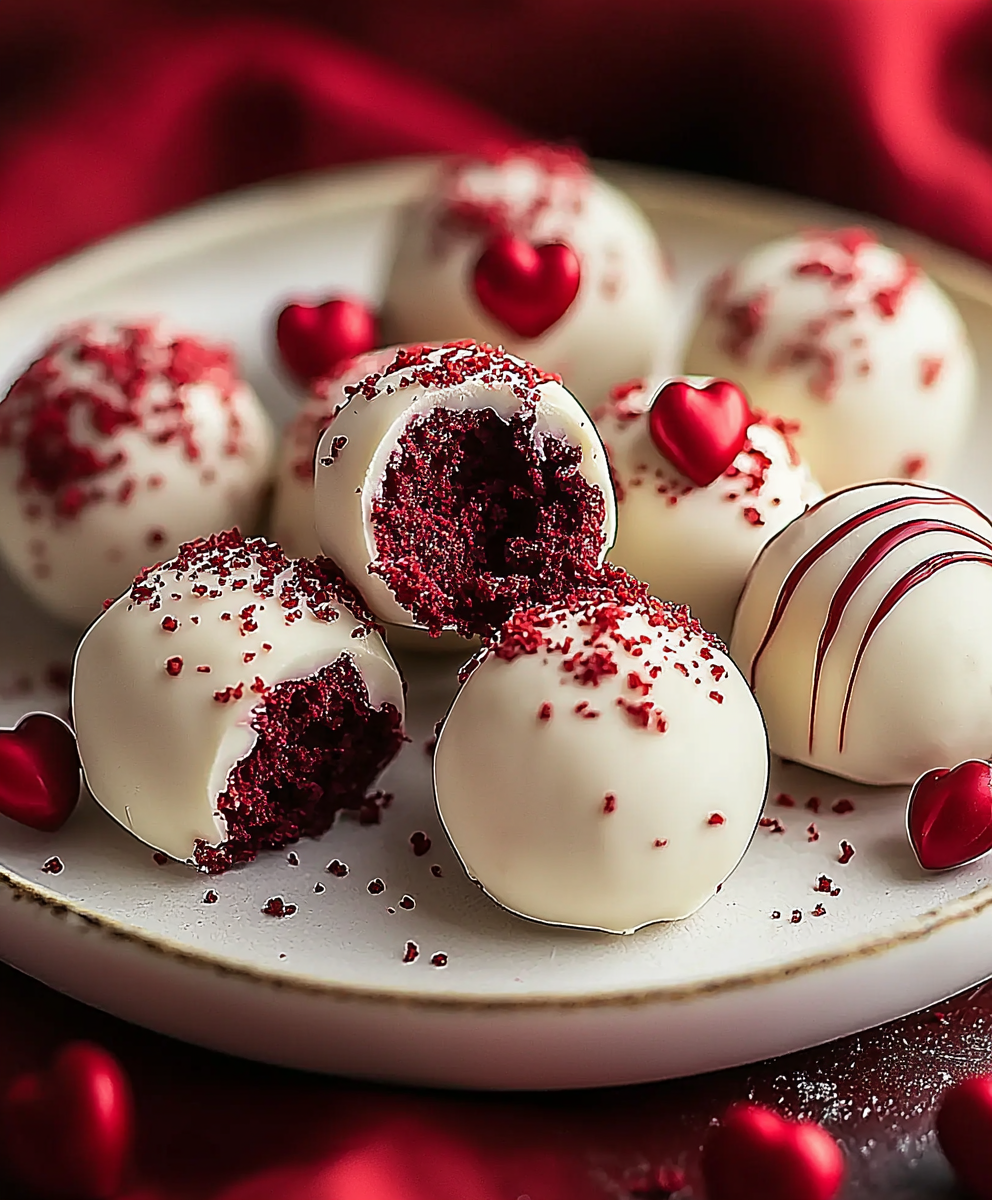
Decadent red velvet cake balls dipped in chocolate and decorated with sprinkles. A perfect bite-sized treat!
Ingredients
- 2 1/2 cups all-purpose flour
- 2 cups granulated sugar
- 1 teaspoon baking soda
- 1 teaspoon baking powder
- 1 teaspoon salt
- 1 tablespoon unsweetened cocoa powder
- 1 cup buttermilk
- 1 cup vegetable oil
- 2 large eggs
- 2 teaspoons vanilla extract
- 1 ounce (2 tablespoons) red food coloring
- 1 teaspoon white vinegar
- 8 ounces cream cheese, softened
- 1/2 cup (1 stick) unsalted butter, softened
- 4 cups powdered sugar
- 1 teaspoon vanilla extract
- Pinch of salt
- 12 ounces chocolate candy coating (white, dark, or milk chocolate), or almond bark
- Optional: Sprinkles, chopped nuts, or other decorations
Instructions
- Preheat your oven to 350°F (175°C). Grease and flour a 9x13 inch baking pan.
- In a large bowl, whisk together the flour, sugar, baking soda, baking powder, salt, and cocoa powder.
- In a separate bowl, whisk together the buttermilk, oil, eggs, and vanilla extract.
- Gradually add the wet ingredients to the dry ingredients, mixing on low speed until just combined. Be careful not to overmix!
- In a small bowl, combine the red food coloring and white vinegar. Add this mixture to the batter and mix until evenly colored.
- Pour the batter into the prepared baking pan and spread it evenly. Bake for 25-30 minutes, or until a toothpick inserted into the center comes out clean.
- Let the cake cool in the pan for 10 minutes before inverting it onto a wire rack to cool completely.
- In a large bowl, beat the softened cream cheese and butter together with an electric mixer until smooth and creamy.
- Gradually add the powdered sugar, one cup at a time, beating on low speed until combined.
- Stir in the vanilla extract and salt. Mix until smooth and creamy. Taste and adjust sweetness if needed.
- Once the cake is completely cool, crumble it into a large bowl.
- Add the cream cheese frosting to the crumbled cake. Start with about 3/4 of the frosting and mix well with your hands until the mixture is moist and holds together when pressed. You might need to add more frosting, depending on the moisture content of your cake.
- Roll the mixture into 1-inch balls. Place the cake balls on a baking sheet lined with parchment paper.
- Place the baking sheet in the refrigerator and chill the cake balls for at least 30 minutes.
- Melt the chocolate candy coating according to the package directions. You can use a double boiler or melt it in the microwave in 30-second intervals, stirring in between, until smooth.
- Remove the chilled cake balls from the refrigerator. Dip each cake ball into the melted chocolate, using a fork or dipping tools to coat it completely. Tap off any excess chocolate.
- Place the dipped cake balls back on the parchment-lined baking sheet. Immediately sprinkle with sprinkles, chopped nuts, or other decorations, if desired.
- Let the chocolate set completely. This will take about 30 minutes at room temperature, or you can speed up the process by placing them in the refrigerator for a shorter time.
- Enjoy! Store the cake balls in an airtight container in the refrigerator. They are best enjoyed within a few days.
Notes
- Make sure your cream cheese and butter are softened for the frosting to avoid lumps.
- Don't overmix the cake batter, or it will become tough.
- Chilling the cake balls before dipping is crucial for them to hold their shape.
- If the chocolate seizes while melting, try adding a teaspoon of vegetable oil and stirring until smooth.
- Get creative with your decorations! Use different colored sprinkles, chopped nuts, or even a drizzle of white chocolate.